Skip to content
Taste the Best Recipes Every Day
Home
Recipes
Expand
blog
appetiser
baking
beef
breakfast
chicken
lunch
pasta
salad
salmon
sauce
soup
steak
Uncategorized
Posts
about
contact
Search
Taste the Best Recipes Every Day
Search
Toggle Menu
Popular Recipes 🔥
Popular Chicken Recipes 🔥
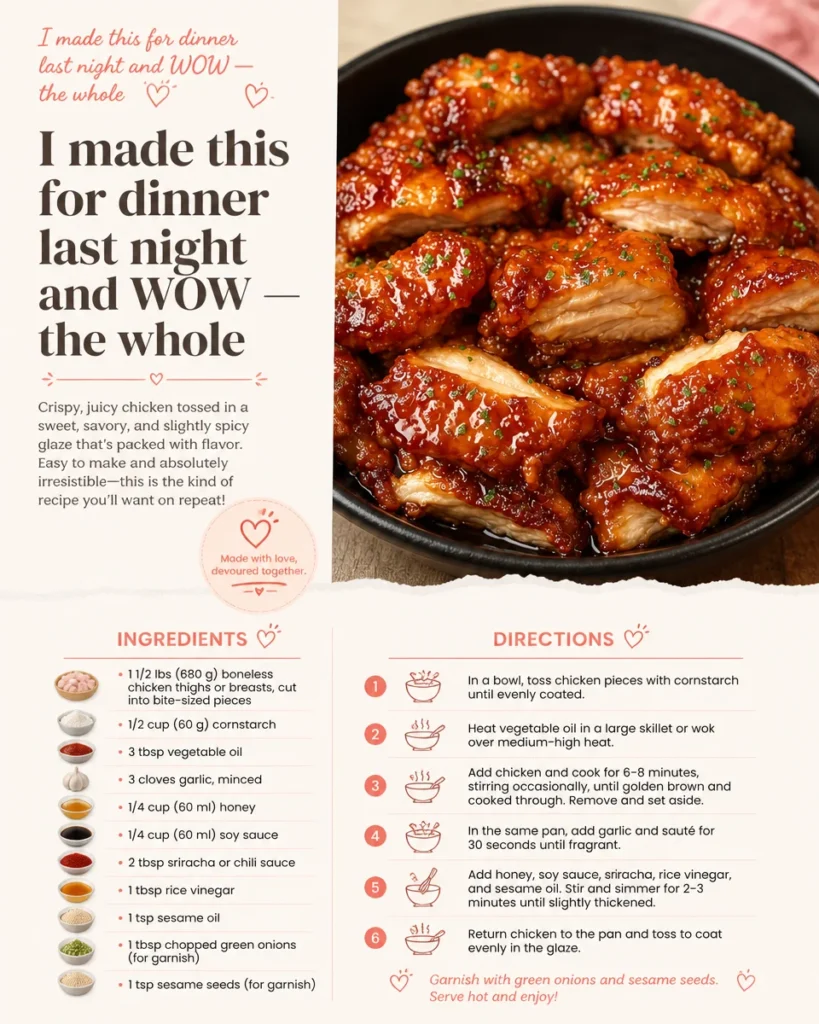
My 15-Year-Old Daughter Fried This Chicken
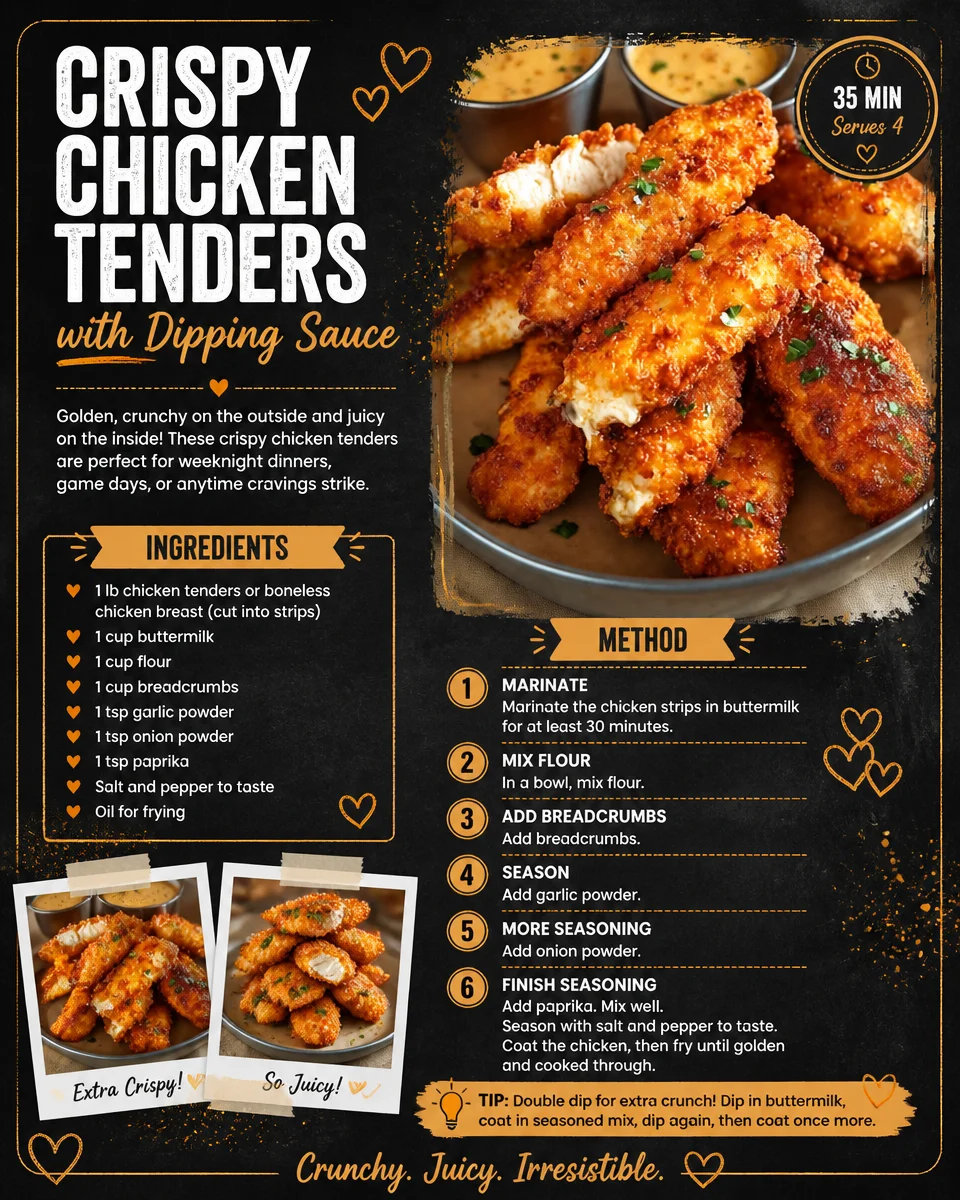
Crispy Chicken Strips
Easy Homemade Recipes for Every Day
baking
Swiss Roll Meets Black Forest Flavor
baking
Berry Bombs: Strawberry-Inspired Treats
chicken
My 15-Year-Old Daughter Fried This Chicken
chicken
Crispy Chicken Strips
Popular recipes you'll love 🍴
Swiss Roll Meets Black Forest Flavor
Berry Bombs: Strawberry-Inspired Treats
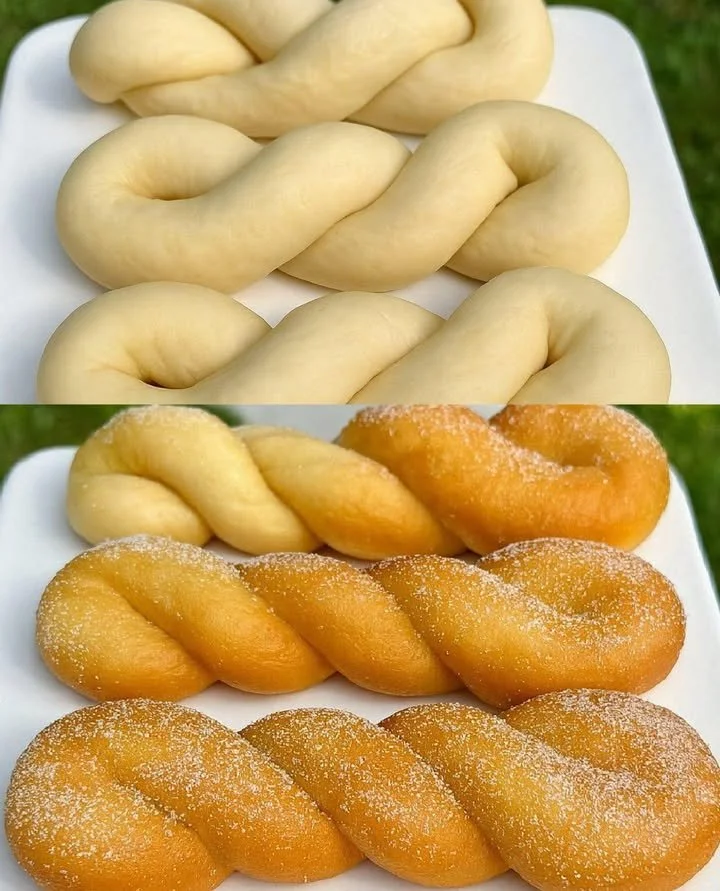
Twisted Doughnuts
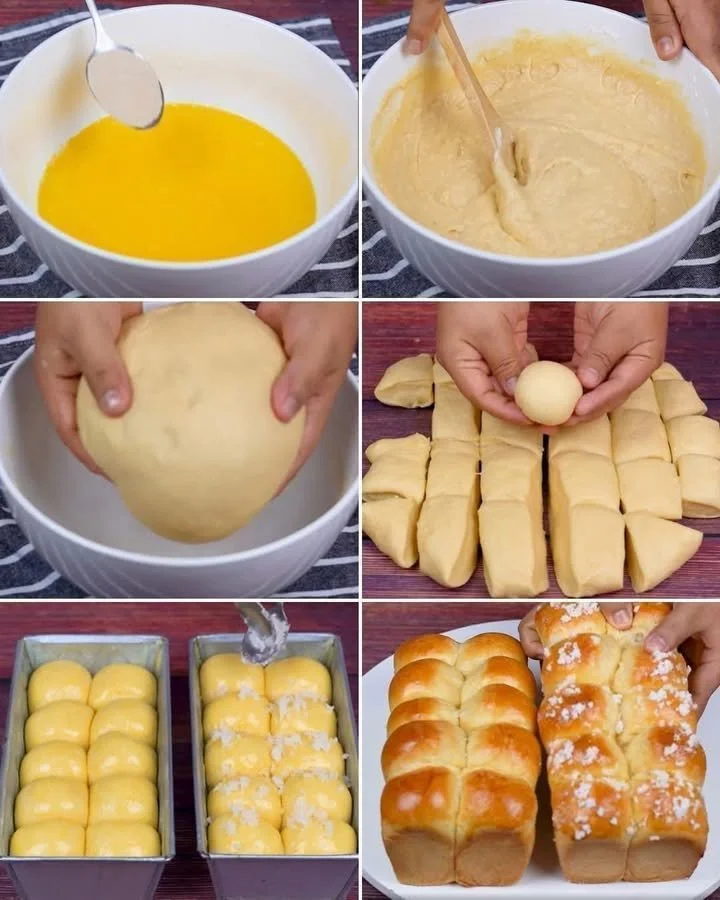
Milk-Infused Brioche Rolls
My 15-Year-Old Daughter Fried This Chicken
Crispy Chicken Strips
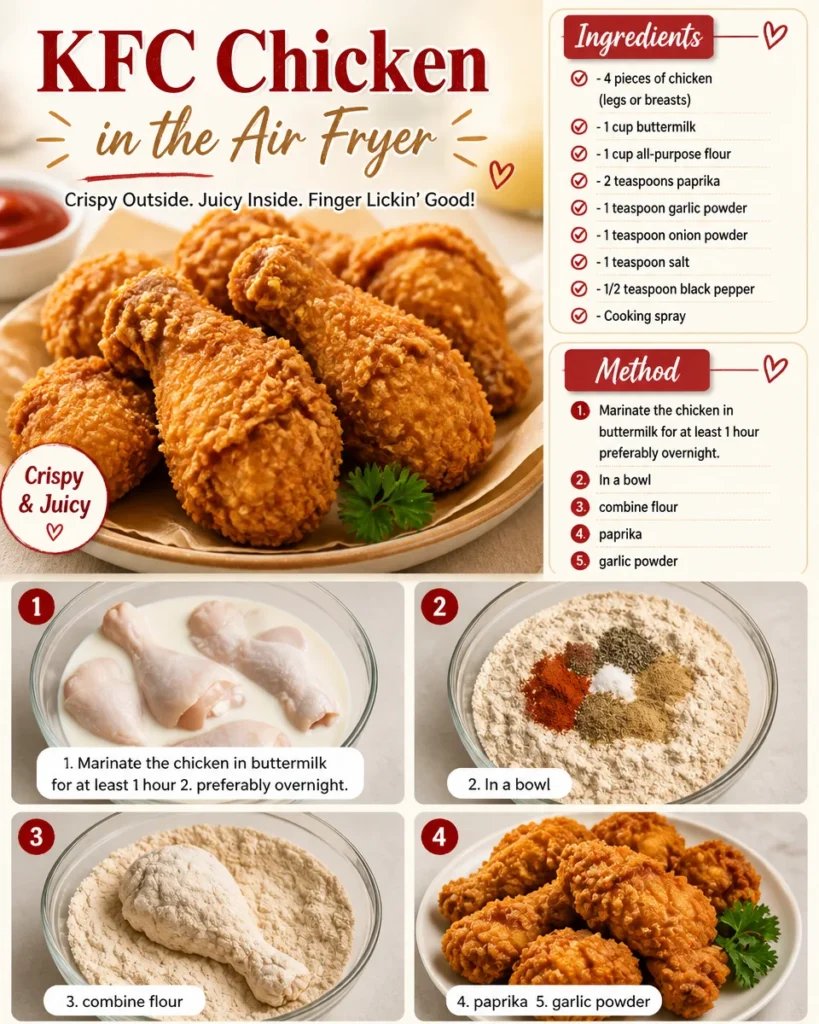
KFC Chicken in the Air Fryer
Family-Favorite Dinner Recipe That Became Our Weekly Rotation
Swiss Roll Meets Black Forest Flavor
Berry Bombs: Strawberry-Inspired Treats
My 15-Year-Old Daughter Fried This Chicken
Crispy Chicken Strips
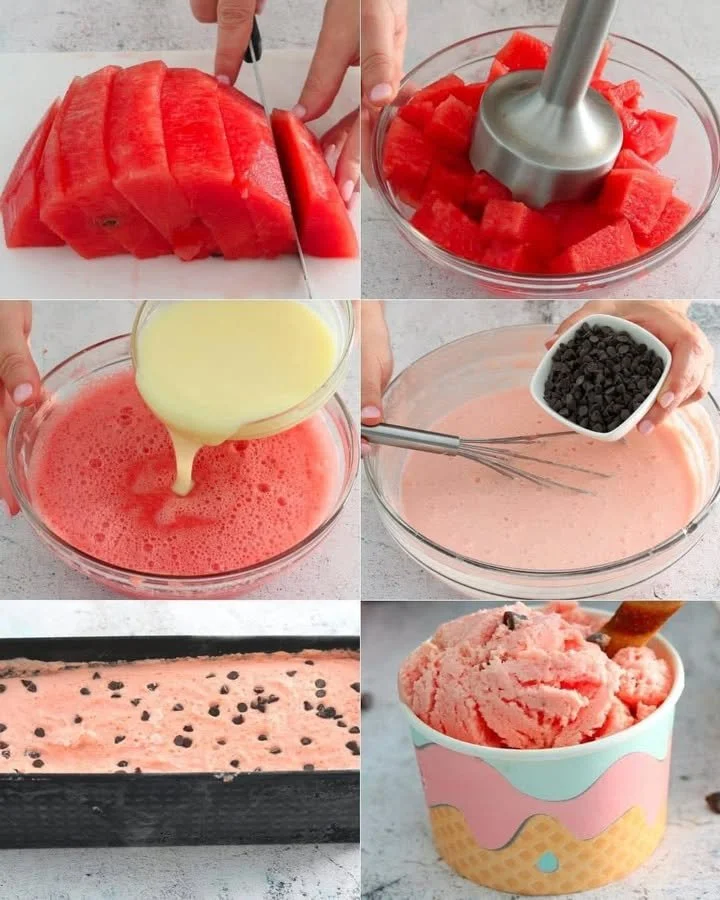
Watermelon Ice Cream Recipe
Twisted Doughnuts
Home
Recipes
Toggle child menu
Expand
blog
appetiser
baking
beef
breakfast
chicken
lunch
pasta
salad
salmon
sauce
soup
steak
Uncategorized
Posts
about
contact
Toggle Menu Close
Search for:
Search